Showing posts with label Blogger Templates. Show all posts

Showing posts with label Blogger Templates. Show all posts

WP-Polaroid Blogger Template


I’m very pleased to announce the release of WP-Polaroid for Blogger! This template is full of cool features and took me a long time to convert from the original WordPress theme (by Adii) so I hope you appreciate it. :-)

This template is very popular with WordPress users and for good reason. It’s stylish, nicely laid out, and very web 2.0. Not only that, it’s also got the following sidebar page elements built in. You just need to configure them (follow the directions below) in order for them to work properly.

  • Flickr photo slideshow area where you can display your personal or random pictures
  • Mybloglog recent blog readers section (you’ll need a mybloglog account)
  • Three 125×125 ad spots to help you make money from your blog
  • Recent posts list
  • Recent comments list
  • Two sidebar link lists
  • Page navigation links in the header
  • RSS feeds for your posts and comments
  • A header spot to display your personal photo

Make sure to read through all the steps below in order for the template to function on your blog properly. I tried to make it as simple for you as possible by using the Page Elements instead of embedded code but if you have any questions, please post them below. I usually get back to everyone within 24 hours so please be patient!

Also, please be aware that in order to correctly setup this template you’ll need to be comfortable with editing the template code as well as some experience with photo editing software (see step #9). I’d hate for you to spend a bunch of time trying to get this template working only to hit a road block towards the end.

WP-Polaroid Blogger Installation

Now I’m going to be honest with you before we begin. When you use this template you’ll most likely have to wipe out all your existing page elements and start from scratch. Not only is this easiest but it also gives you a clean slate. Now this isn’t always the case but I just wanted to warn you upfront. You might even want to setup a new blog within Blogger to test this template out before you really start using it. It’s easy to do — just go to your Blogger dashboard (top right corner link) and “create new blog”. Think of it as a testing area before clobbering your existing blog. Another option is to try and backup your existing page elements which is explained in my “How to Install a Blogger XML Template” article.

Disclaimer: I am not responsible if you mess up your Blogger site. This template and set of instructions is free but does not come with any sort of warranty. I’m sure you already realize this but I just wanted to cover my butt regardless. (this is the fine print)

The following 10 steps assume you’ve installed the new WP-Polaroid Blogger template and are now ready to configure the page elements. If you had trouble installing the template, try applying it a second time and saving. Blogger is buggy and that’s actually what I had to do when setting up a demo blog for this writeup (Update - you might want to start with step #10 and then come back to step #1 since it involves editing the actual template code before setting up the page elements).

You can also download the original Photoshop .psd from Adii’s site if you’d like to modify the images. He also provides some steps on setting up the template but for WordPress only.

Open your blog site in a new browser window so you can see how it currently looks. I’ve put some placeholder text in some areas (which we’ll replace in the steps below) to give you an idea as to how it’s supposed to look. Now in a separate browser window, head on over to “Template” =>”Page Elements” and we’ll start setting up your new Blogger template.


DOWNLOAD

iTheme Template


This beautiful Apple OS knock off new Blogger template is awesome. Not only does it look and feel just like you’re using a Mac, but it’s quite functional as well. It includes the original really cool drag & drop sidebar feature which allows you to rearrange the order of your sidebar in a dynamic fun way (check out the demo and try it yourself). It also includes the FeedIt widget which shows real-time live traffic to your site.

This template also comes with a top AdSense link unit which is a great spot to make money with your blog. Make sure you have a Google AdSense account and then you’ll need to modify the template code and replace the AdSense code with your own.

So if you’ve got the iPhone, iTouch, iPod, iMac, and all the other amazing Apple products, this template has your name all over it. Now you can have your own iBlog template!

I love the silver and white modules with the icons and the tabs. Speaking of tabs, if you want to add some you’ll need to edit the “top tabs” page element within Blogger. It’s easy to do though since it’s a link list. That means you don’t need to go muck around in the template code to add/remove new tabs. A cool feature added by eBlog Templates.

The date box on each post is a bonus feature as well. If the date doesn’t show up when you first install it, you’ll have to make a small change in your Blogger settings. Go to “Settings” => “Formatting” => “Timestamp Format” and change it to this format: Saturday, February 09, 2008. That should make the date feature work.


DOWNLOAD

Dreamy Template


Dreamy is a pleasant and relaxing new xml Blogger template with it’s header consisting of a large white feather, blue sky, clouds, and a tree. It’s color scheme is neutral and easy on the eyes while the functionality is nicely done.

It comes with cool tabs that get underlined by an icon when you move your mouse over them. The tabs are also controlled by a link list widget so there’s no need to fudge with the template code. It also comes with a nice rss feed image which changes when you mouse over it as well. The rss feed is wired up so no configuration for you to worry about.

Further down the sidebar, you’ll find a recent posts widget which is very nice to have. It’s a modified version of an rss feed widget so just plug in your rss feed and it will start working.

All images are hosted with our primary service provider (Photobucket) using their Pro account. This means your blog images will work unlike several other sites out there who distribute broken blogger templates. We recommend you move the images to your own server (if you’ve got one) so you have complete control and can add/remove as you please.


DOWNLOAD

Ads Theme Template

Click to enlarge Ads Theme Blogger template

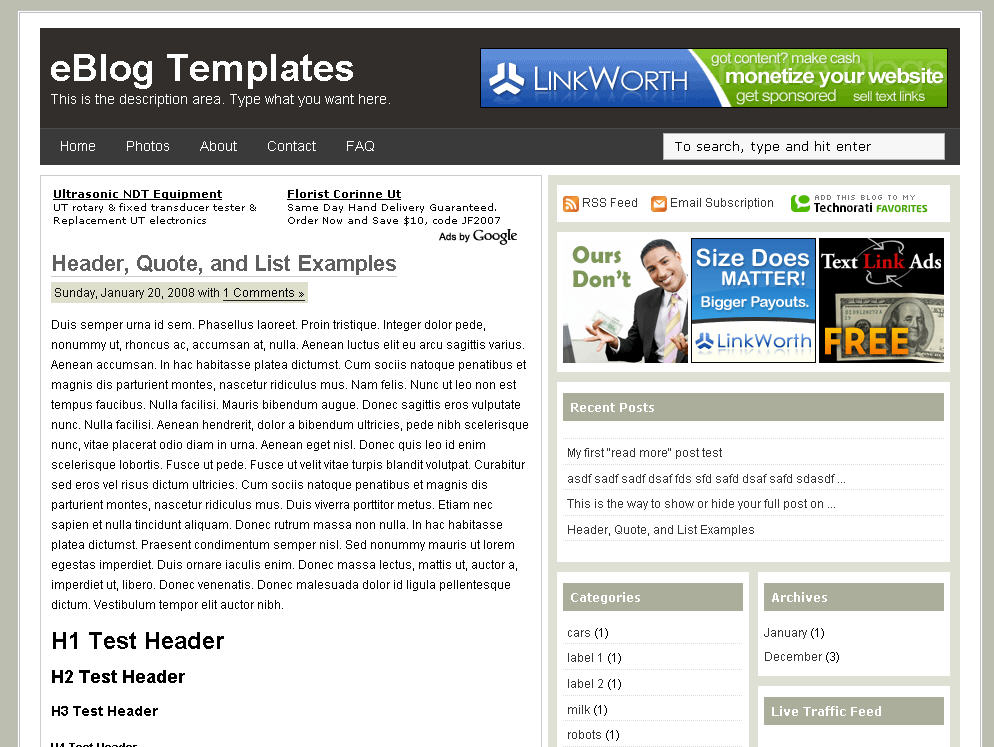
If you’re looking for a new Blogger template, you came at the right time. Hands down, this is the best template we’ve converted here at eBlog Templates. It’s a wonderful web 2.0 popular blog layout with some great built in ad spots (hence the template name) and features.

It’s either a two or 3 column template (you can change it on the fly) so you get the best of both worlds. This Blogger template is what I call a “powerhouse” template since almost all the features you need are already built in. On top of that, it’s quite easy to setup and makes your blog look like a professional site without much effort.

I predict this template will be a top template on this site within a few months, if not weeks. With the amount of effort that went into converting this template and attention to details, I sure hope you appreciate this free amazing new xml Blogger/Blogspot template.

Features Include

  • Two or Three right side columns which are easy to switch (default is three)
  • Three great location ad spots (header banner 468 x 60, three 125 x 125 buttons in sidebar, and a 468 x 60 AdSense banner above the first post)
  • Integrated Feedburner rss and subscribe via email sidebar module (also includes “add to favorites” Technorati link)
  • Built-in live traffic feed widget from FEEDJIT
  • Built-in MyBlogLog and BlogCatalog recent reader widgets
  • Dynamic tabs easily created by editing the link list widget
  • Search box without the need for a “go” button
  • Recent posts and comments widgets
  • Nicely designed individual blog post comments section
  • Properly setup Blogger layout editor

DOWNLOAD

PassionDuo Green Template


Here is the third and final version of our latest make money blogger template first converted here at eBlog Templates.

This template includes several popular ad formats for your blog. You get a 468 x 60 banner spot in the header, six 125 x 125 banner spots in the right sidebar, and plenty of other sidebar spots for skyscraper banners.

We’ve also included our popular sidebar widgets such as Recent Posts, Recent Comments, and the cool Feedjit (real time visitor widget). Just paste in your blog rss feed urls into the Recent Posts & Comments widgets and they’ll start working.

Unlike most other custom make money blogger templates, we’ve taken the extra step and setup the “Fonts & Colors” functionality. That means you can change all the colors and font styles easily by just using the built in Blogger section. We’ve also customized the comments section so it looks very professional as well.

PassionDuo also includes top tabs which can be added via your Blogger page element screen. The rss feed icon will automatically appear once you add your first tab so don’t be alarmed after you first install it.

Configuring the rest of this template is actually quite easy. You can swap out the ads and replace them with your own or feel free to keep the existing ones if you don’t have any to use. Make sure you check the “Expand Widget Templates” checkbox on the “Edit HTML” page within Blogger before trying to make any edits. Also make sure to backup your old template just in case you make a mistake.

Let’s start with the 468 x 60 header banner. Search for “” in the template code and the first one you come across is where you replace the ad.

The second instance of “” is for the Google AdSense code which you can either keep, replace, or just remove completely.

For the six 125 x 125 banner ads you’ll need to find “” and update those one by one. Make sure not to delete the

  • and
  • before and after each ad otherwise it will look funny. If you don’t already have ads to use, I recommend clicking through each banner and become an affiliate. Then you can replace the affiliate codes with your own and start making money!

    DOWNLOAD